Friday, December 31, 2010

Reflections of 2010 - and of Frozen Manure

Today's post is dedicated to my reflections on 2010...oh, and steer clear of frozen manure, just BTW. I had a hard time with that this morning. 20 degrees F., I was fine, with my nice warm felt hat (with fold-down ear covers, a gift from my parents for Christmas), gloves, big coat, two pairs of socks...I was perfectly toasty, but the manure frozen into the mud was rather comical - I literally laughed out loud when I found myself hammering at the stuff with my manure fork...

But enough on that subject...

Here are some reflections on the last year, along with some of my accomplishments:

This time last year, I was just starting my new job at the ranch down the street...I have been enjoying it ever since.

Making money only made my obsession with everything model horsey worse - my collection grew from maybe 50 to over 100 today.

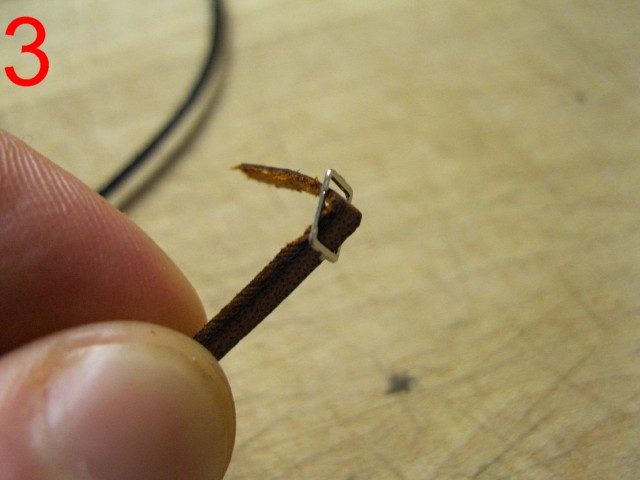
I made several model horse tack items this year; a silvery Western saddle that sold on eBay for $150.00, two dressage saddles (one for me, one for my mom's Seabiscuit model), and many other odds and ends. There is something about tack that soothes my stress - I tend to be a high-energy individual (my heart rate yesterday evening was over 80 bpm), and the tack-making is wonderful to calm me down.

(just a note, at first glance, you wouldn't think I was high-output...)

I took my leased TB/Paint/QH to a 4-H show and got three blues out of four green horse classes. However, I took that same horse to County Fair for 4-H and he was a neurotic mess...(note to self, NEVER breed a Paint to a Thoroughbred)

One of my 4-H photography exhibits got a Champion ribbon and went to State fair, only to bring home another BLUE!!!

(above: me and Buck, the Thoroughbred cross, at the County Fair about to go into the Costume Contest...like his ears?)


So, there it is: a brief summary of my 2010 highlights. Tomorrow I'll tell you my New Year's resolutions, but for now, enjoy some of my photography:


Happy New Year!!

Thursday, December 30, 2010

Rain at The Ranch...and the Rain-Swollen Creek...

I took some photos while I was at work yesterday morning...enjoy!


 Okay, so this one isn't my best shot, but...hey, lotsa water, right?
This creek is at the end of my boss's pasture...it makes a natural fence for the horses because it drops straight down into the water. Normally, the water level (mid-summer) is about three to five feet below the level of the pasture...yesterday, there was barely a one-foot drop below my feet to the water.


Today's weather - snow. Woke up to a dusting and it's been slightly dusting all morning, but it doesn't look very serious.


My Rio Rondo leather and hardware from RDLC is on it's way, along with a Breyer Thoroughbred mare and foal set from Sheryl Leisure's collection...
Can't wait! Happy New Year everyone!

Wednesday, December 29, 2010

Tack Instructions: How to Make a Shadow Roll Noseband

NOTE: I put the buckle on the wrong side - MAKE SURE you put the buckle cheekpiece on the LEFT side of the model's head!!!

I had an itch to make something last night, and I remembered the leftover chamois I had…by the way, I live off of leftovers! So, Zenyatta’s shadow roll (shadow roll is racetrack speak for fleece covered noseband) was born…here are some instructions on how to make your own.
Start with supplies;1
leather lace (I used 3/32” for the noseband part, and 1/16” for the crownpiece),
a fleece imitation material (e.g. chamois),
two buckles (again, one 3/32” for the noseband part and 1/16” for the crownpiece),
glue (I use Duco cement – it bonds extremely fast. Just be careful, though – once you get it on your model, it won’t come off!).
An X-Acto knife is great for cutting the lace and for skiving. You also should have the model you are making the noseband for on hand so it fits correctly. I also have my racing bridle on hand to put the noseband onto it when I finish.
Oh, and don’t forget the complementary snack of trail mix…rasins separated from the cashews.
Start out by taking your 3/32” lace (or noseband lace) and skiving a thin slice of leather off of the last half inch. Make a fold in the middle of the skived section 2 and crimp it with the flat portion of a pair of pliers.

Now, take your 3/32” buckle and thread it onto the crimped lace as shown in the photo 3. Glue that tab down and let the glue dry.
Once the glue is dried, take the lace (with the buckle on one end) and wrap it around your model’s nose as shown in the photo 4.

With the lace held about where the noseband should sit, fold a slight crimp into the lace about ½” past the buckle; see photo again, note where my finger is on the lace, crimp the piece on the  left. Take lace off of your model and cut at the crimp. Trim the end into a triangular taper, and if you’d like, you can skive a half inch off the tapered end for ease of fastening.
Once finished with that, buckle the strap (feed the tapered end into your buckle) and slide it onto your model’s nose 6
Make sure it sits exactly where you’d like the finished noseband to sit. Center the buckle between the model’s jawbones 5
Now, take another look at the 5th photo above. Take your X-Acto knife and make a mark on the noseband just a smidge below the jawbone. Make a slit big enough to accommodate the 1/16” lace through the 3/32” lace. 7
 This photo shows the slit. Fold the still-fastened noseband in half and duplicate the slit on the other side of the noseband.
Take the 1/16” lace and skive a section off the end.  I used a pair of tweezers to poke the lace through. 8  fold the lace over and glue it to itself. This is the beginning of the buckle strap.
Now, put the noseband on your model and hold the lace against her face where it should sit. Make a fold just below the model’s eye. 9 Cut the lace about ¼” past the fold, making a tab. Skive the tab and thread it through the 1/16” buckle. Glue the tab and let the glue dry before moving on.
Repeat the above process (minus the buckle), and pull the lace over the model’s head, like so: 10
Note where Zenny’s jawbone is on the excess lace; trim there and cut a taper onto the end. You can fasten the crownpiece if you like to check fit. 11 12


Now, unbuckle the noseband and lay it out on your workspace. 13 Check a reference picture for the correct size and placement of your shadow roll on the noseband. 14


Lay out your chamois so that one corner lines up with the inside of one of the crown pieces. 15 16 Trim the chamois just inside the opposite cheek piece and slice as evenly as you can into the chamois about ½”.

Flip the noseband over so that the flesh (rough) side is up, and smear some glue on the flesh side of the noseband inside the cheekpieces 17 . Press the chamois against the glue as shown above. LET THIS DRY COMPLETELY BEFORE MOVING ON, OR THE GLUE BOND MAY NOT HOLD.

Once glue is dry, roll the noseband so the chamois wraps around the leather lace. 18 Once you know how much chamois it will take to completely cover the noseband once, just overlapping the edge of the previously glued section, and trim it as evenly as possible.

19 I unwrapped the chamois to give you an idea of how much chamois you’ll need.  If you unwrapped to check, wrap it back up and run a strip of glue along the edge and press the chamois down. AGAIN, LET THE GLUE DRY BEFORE MOVING ON, OR YOU WILL WEAKEN THE GLUE BOND. You can bend the noseband a little as if it were on the model’s nose – just don’t put it on the model or you will leave wet glue that will not come off!


20 I overlapped a little more than I needed, but if you did that too, no big deal. Too much is better than not enough – remember that. Just trim it off like I did above.
21 The finished product! Enjoy the next few photos of Zenyatta’s new shadow roll! P.S. THIS SET MAY BE FOR SALE IN THE FUTURE! KEEP CHECKING UP ON MY BLOG FOR MORE INFO!!


Please ignore the annoying yellow...having some problems with the highlighter...

Tuesday, December 28, 2010

Western Two-ear Bridle with Romal Reins

So, here is the bridle I made for a friend as a Christmas gift...
Side shot
The bit...a Rio Rondo cast Western Bit...I liked this one for the Romal reins.

Beee-utiful chain sections on the reins and a real curb chain...this part made me so giddy! I love it!

Handmade buckle with a Rio Rondo keeper. Hand-punched holes...gotta love Fleetstreet Max's blue eye! He is my Western tack display model for certain!


I can make this for anyone who wants one, in any color, any bit, if real horses wear it, I'll make it! - $35 for the bridle, shipping not included.

Hello! Here I am!

Hello! I am Alex Noble, the Owner and Tackmaker of Noble Farms Custom Saddlery. I have completed a few saddle sets for Breyer model horses so far, and I have supplies for two more on the way. I will post a few photos soon of two bridles and a halter I just recently finished. Thansk so much for reading and God Bless!